Master the Pull-Up: Beginner’s Guide to Your First Rep

Master the Pull-Up: A Beginner’s Guide to Achieving Your First Rep offers a comprehensive roadmap for individuals aiming to conquer this challenging exercise, detailing essential preparatory exercises, step-by-step guidance, and troubleshooting tips for a successful first repetition.
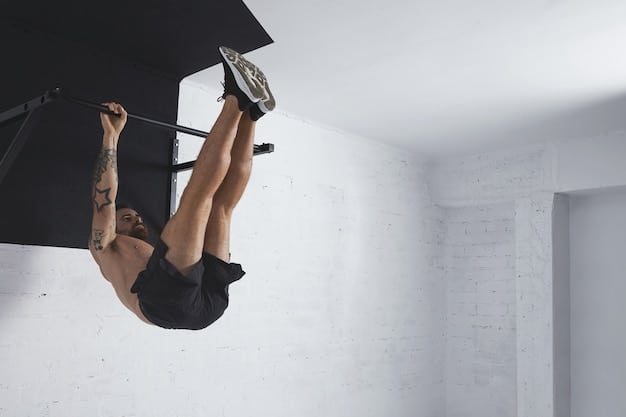
Ready to conquer the pull-up bar? This guide, Master the Pull-Up: A Beginner’s Guide to Achieving Your First Rep, will break down the process into manageable steps, helping you build the strength and technique needed to achieve this impressive feat of strength.
The Pull-Up: Why It’s a Great Goal
The pull-up is often seen as a benchmark of upper body strength. But beyond bragging rights, why is it such a desirable exercise to master?
Benefits Beyond the Bar
Pull-ups are a compound exercise, meaning they work multiple muscle groups simultaneously. This makes them incredibly efficient for building strength and muscle. Let’s explore some key benefits:
- Back Strength: Primarily targets the latissimus dorsi (lats), the large muscles that contribute to a V-shaped back.
- Bicep Development: Engages the biceps brachii, contributing to overall arm strength and definition.
- Grip Strength: Requires a strong grip, which translates to improved performance in other exercises and daily activities.
- Core Engagement: Stabilizes the body, activating core muscles for a full-body workout.
Beyond the physical benefits, achieving your first pull-up can be a huge confidence booster. It’s a tangible demonstration of your progress and dedication to fitness.
In short, make sure you are warmed up before attempting any of these excercises! A simple warm up can include dynamic stretches like arm circles or torso twists.
Assessing Your Current Strength Level
Before jumping straight into pull-up attempts, it’s essential to assess your current strength level. This will help you tailor your training and avoid frustration.
Here are a few simple tests:
The Dead Hang Test
This test measures your grip strength and shoulder stability. Simply hang from a pull-up bar with your arms fully extended. How long can you hold the position without losing your grip or experiencing shoulder discomfort?
- Less than 15 seconds: Focus on grip strengthening exercises.
- 15-30 seconds: Good starting point. You have a decent level of grip strength.
- Over 30 seconds: Excellent grip strength. You can likely progress to more advanced exercises.
Consider the dead hang as a measure for your grip strength and shoulder stability.
Inverted Rows
Also known as Australian pull-ups, these are a great way to build pulling strength in a horizontal plane. Using a low bar or suspension trainer, pull your chest towards the bar, keeping your body in a straight line.
Mastering the Negative Pull-Up
Negative pull-ups, also known as eccentric pull-ups, are a powerful tool for building the strength needed for a full pull-up. This exercise focuses on the lowering portion of the movement, which is often easier than the pulling-up phase.
How to Perform Negative Pull-Ups
Here’s a step-by-step guide:
- Use a box or bench to assist you in getting to the top position of a pull-up (chin above the bar).
- Slowly lower yourself down, controlling the descent as much as possible.
- Aim for a descent of 3-5 seconds.
- Once you reach the bottom, repeat the process.
Negative pull-ups allow you to train the muscles used in a pull-up even if you can’t yet perform a full repetition.
Assisted Pull-Ups: Using Bands for Support
Assisted pull-ups are a great way to bridge the gap between negative pull-ups and unassisted pull-ups. Resistance bands provide support, making the exercise easier while still engaging the necessary muscles.

Choosing the Right Band
Resistance bands come in varying levels of thickness, each providing a different amount of assistance. Start with a band that allows you to perform 8-12 repetitions with good form.
- Thicker bands: Provide more assistance, making the exercise easier.
- Thinner bands: Provide less assistance, requiring more of your own strength.
As you get stronger, you can gradually switch to thinner bands to progressively increase the challenge.
You can experiment with different band thicknesses until you find right one for you.
Grip Strength Training: Essential for Pull-Up Success
Grip strength is often an overlooked component of pull-up training. If your grip fails before your muscles do, you’ll struggle to progress.
Exercises to Strengthen Your Grip
Here are a few effective exercises:
- Farmer’s Walks: Hold heavy dumbbells or kettlebells in each hand and walk for a set distance or time.
- Plate Pinches: Pinch two weight plates together with the smooth sides facing out. Hold for as long as possible.
- Towel Pull-Ups: Drape a towel over the pull-up bar and grip the ends with your hands. Perform pull-ups or hangs.
Consistency is key when it comes to grip strength training. Incorporate these exercises into your routine 2-3 times per week.
Putting It All Together: Your Pull-Up Training Plan
Now that you have a toolbox of exercises, it’s time to create a structured training plan.
A sample plan is:
Sample Weekly Schedule
This is just a sample plan, so feel free to adjust it based on your needs and progress.
- Monday: Negative Pull-Ups (3 sets of 5-8 reps)
- Wednesday: Assisted Pull-Ups (3 sets of 8-12 reps)
- Friday: Grip Strength Training (Choose 2-3 exercises and perform 3 sets each)
Remember to listen to your body and allow for adequate rest and recovery. Overtraining can lead to injury and hinder your progress.
The key to getting better at pull-ups is to do them as often as possible. The more you practice, the stronger you will get and the quicker you will be able to do a pull up.
| Key Point | Brief Description |
|---|---|
| 💪 Assess Strength | Test grip & upper body strength with dead hangs and rows. |
| 🏋️ Negative Pull-Ups | Focus on slow, controlled lowering to build initial strength. |
| 🎽 Assisted Pull-Ups | Use resistance bands to gradually reduce assistance. |
| 🤝 Grip Strength | Enhance grip with exercises like farmer’s walks and towel hangs. |
Frequently Asked Questions
▼
The time it takes varies greatly depending on your current strength level, training consistency, and genetics. Some may achieve it in a few weeks, while others may take several months. Be patient and persistent!
▼
You can use a sturdy doorframe pull-up bar or find a bar at a local park or gym. Alternatively, focus on inverted rows as a substitute exercise.
▼
Aim for 2-3 times per week, allowing for at least one day of rest between sessions. This will give your muscles time to recover and rebuild.
▼
Some muscle soreness is normal, especially when starting a new exercise. However, excessive pain could indicate an injury. Listen to your body and adjust your training accordingly.
▼
Avoid using momentum (kipping), not using a full range of motion, and neglecting grip strength training. Focus on proper form and controlled movements for optimal results.
Conclusion
Mastering the pull-up is a challenging but rewarding journey. By following this beginner’s guide, assessing your strength, and incorporating the right exercises into your training plan, you’ll be well on your way to achieving your first rep and unlocking a new level of upper body strength.

")


